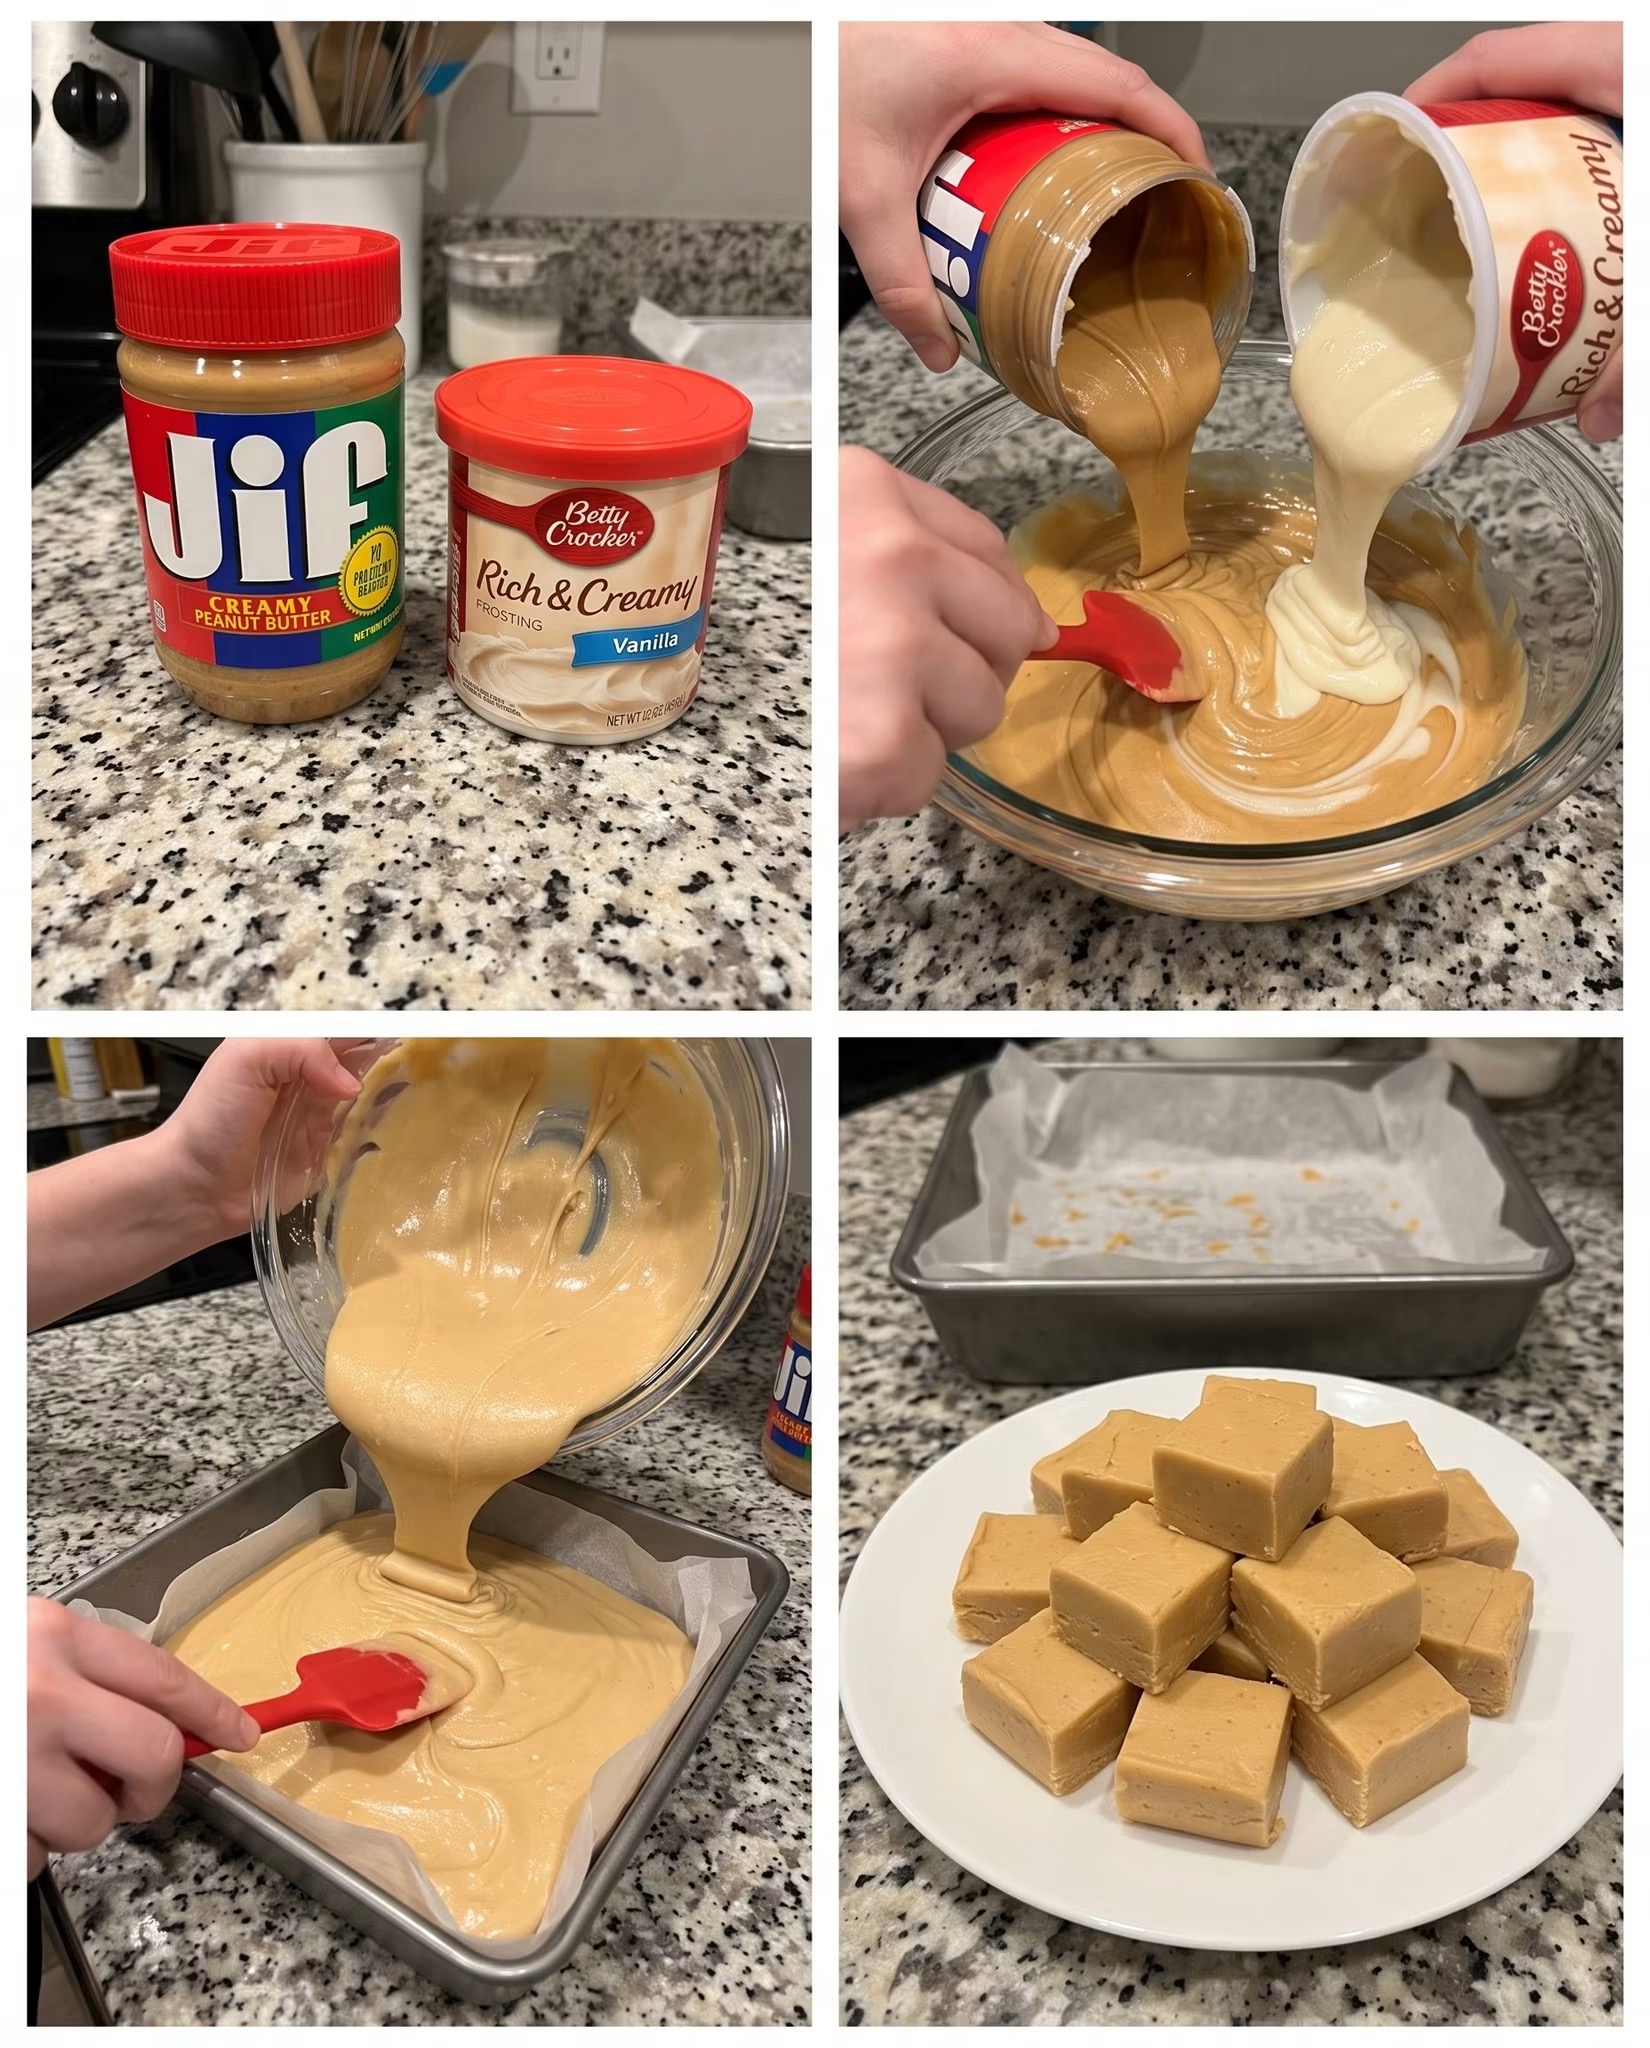
2-Ingredient Peanut Butter Fudge 🥜🍫
If you love easy homemade desserts, this 2-Ingredient Peanut Butter Fudge is a recipe you need to try! It is rich, creamy, sweet, and packed with delicious peanut butter flavor. The best part? You only need two simple ingredients and a few minutes of preparation to make this no-bake treat.
This easy fudge combines creamy peanut butter with vanilla frosting to create a smooth mixture that firms up beautifully in the refrigerator. There is no need for a candy thermometer, complicated cooking techniques, or a long list of ingredients.
It is perfect for holiday dessert trays, family gatherings, potlucks, homemade gifts, or whenever you want something sweet without turning on the oven.
Preparation and Cooking Details
- Prep Time: 10 minutes
- Chilling Time: 2 hours
- Total Time: Approximately 2 hours and 10 minutes
- Servings: 25–36 small squares
- Difficulty: Easy
- Cooking Method: Microwave and refrigerator
- Category: No-Bake Dessert
Ingredients
1. One 16-ounce jar Jif Creamy Peanut Butter
This provides the rich peanut flavor and creamy texture that make the fudge so delicious. Regular creamy peanut butter works best for a smooth, even consistency.
2. One 16-ounce tub Betty Crocker Rich & Creamy Vanilla Frosting
The frosting adds sweetness and helps the mixture set into soft, sliceable fudge after chilling.
Step-by-Step Instructions
Step 1: Prepare the baking pan
Line an 8-by-8-inch square baking pan with parchment paper, leaving a little extra paper hanging over the sides. This will make it easier to lift the fudge out once it has chilled.
You can lightly grease the pan before adding the parchment paper to help keep it in place.
Step 2: Soften the peanut butter and frosting
Remove the peanut butter and frosting from their original containers and place them in separate microwave-safe bowls.
Microwave each mixture for approximately 30–60 seconds, checking frequently and stirring as needed. The goal is to soften the ingredients enough to make mixing easier, not to make them extremely hot.
Important: Never microwave the original plastic frosting tub or peanut butter jar unless the manufacturer specifically states that the container is microwave-safe. Transfer the ingredients to microwave-safe bowls first.
Step 3: Combine the two ingredients
Add the softened peanut butter and vanilla frosting to a large mixing bowl.
Stir vigorously with a sturdy spatula or spoon until both ingredients are fully incorporated. Scrape the sides and bottom of the bowl as you mix to ensure there are no streaks of frosting remaining.
Continue mixing until the mixture looks smooth, thick, and evenly colored.
Step 4: Spread the fudge into the pan
Transfer the mixture into the prepared baking pan. Use a spatula to spread it evenly into the corners.
Smooth the surface so the finished fudge has a neat appearance. Gently tap the pan on the counter a couple of times to help level the mixture.
Step 5: Refrigerate until firm
Place the pan in the refrigerator for at least 2 hours, or until the fudge is firm enough to cut.
If the center still feels soft, allow it to chill longer. The exact setting time can vary depending on your refrigerator and the consistency of the ingredients.
Step 6: Slice and serve
Lift the chilled fudge out of the pan using the parchment paper. Place it on a cutting board and cut it into small squares with a sharp knife.
For cleaner cuts, wipe the knife between slices. Arrange the squares on a serving plate and enjoy!
Helpful Tips for Perfect Peanut Butter Fudge
Use creamy peanut butter. A conventional creamy peanut butter gives the fudge a smooth texture. Natural peanut butter that separates easily may produce a softer or oilier result.
Do not overheat the ingredients. Gentle warming makes the ingredients easier to combine. Excessive heat can affect the texture, so use short microwave intervals if needed.
Allow enough chilling time. Refrigeration helps the mixture firm up. If you want particularly neat squares, chill it until thoroughly set before cutting.
Make clean slices. A large, sharp knife works best. Wiping the blade after every few cuts keeps the edges tidy.
Cut into small portions. This fudge is rich and sweet, so small squares are ideal for serving at parties or adding to dessert platters.
Delicious Variations
Although the original recipe uses only two ingredients, you can customize it if you do not mind adding extras.
- Chocolate peanut butter fudge: Use chocolate frosting instead of vanilla frosting for a chocolate flavor.
- Crunchy peanut butter fudge: Replace creamy peanut butter with crunchy peanut butter for extra texture.
- Chocolate drizzle: Drizzle melted chocolate over the chilled fudge and let it set before serving.
- Chopped peanut topping: Sprinkle finely chopped peanuts over the mixture before refrigerating.
- Holiday fudge: Add festive sprinkles on top before chilling for a colorful dessert platter.
Keep in mind that additional ingredients may change the final texture and setting time.
How to Store Peanut Butter Fudge
Store the fudge in an airtight container in the refrigerator for up to one week for best quality. Separate layers with parchment paper to prevent the pieces from sticking together.
You can also freeze the squares in a freezer-safe airtight container for up to two months for best quality. Thaw them in the refrigerator before serving.
Because this recipe contains peanut butter and prepared frosting, avoid leaving it in a warm environment for extended periods. Always check the product labels and follow their storage instructions.
Frequently Asked Questions
Can I make this fudge without an oven?
Yes! This is a no-bake recipe. You only need a microwave to soften the ingredients and a refrigerator to set the fudge.
Why is my fudge still soft after two hours?
It may need more chilling time, or the ingredients may have become too warm during mixing. Refrigerate it longer and check whether it has firmed up before cutting.
Can I use chocolate frosting instead of vanilla?
Absolutely. Chocolate frosting creates a chocolate-peanut-butter version with a richer cocoa flavor.
Can I double the recipe?
Yes. Double both ingredients and use a larger pan, such as a 9-by-13-inch pan. The thickness and chilling time may vary depending on the pan and mixture depth.
Is this recipe suitable for making ahead?
Yes. Prepare it a day ahead, keep it covered in the refrigerator, and slice it shortly before serving.
Final Thoughts
This 2-Ingredient Peanut Butter Fudge proves that a delicious homemade dessert does not need to be complicated. With creamy peanut butter, vanilla frosting, and a little patience while it chills, you can make sweet, rich fudge with very little effort.
Serve it during the holidays, share it with friends, or keep a batch in the refrigerator whenever a peanut butter craving strikes. It is an easy recipe to save and make again!
Recipe reminder: Check that everyone eating the fudge can safely consume peanuts, since peanut butter is a major allergen.